DIY Industrial Apothecary Cart
/If you read the curbside china cabinet CPR post then you already know how we transformed the top part of the cabinet. If not, you might want to go back and read about it here.
I immediately had a vision for the bottom buffet of the cabinet and enlisted the amazing Amy from Her Tool Belt to help me make my plans a reality. This is a double helping of awesome sauce with two Amys working on this project.
Her Tool Belt asked me to make a drawing of my ideas and she would create the plans. Little did she know my ability to draw anything is pitiful. Seriously, I can envision it all day but getting it from my brain to pencil and paper is nearly impossible.
Surprisingly, she took my sad, sad attempt at the sketch of my idea and developed a plan for exactly what I had in mind - an industrial-style apothecary cart. You can download the FREE PLANS on her website here.
Here's the carcass we started with. Not much to look at right? Don't worry, I have big plans and the outcome is mind-blowing.

{BEFORE}
Since we removed the top of this base and used it on the bookcase project, we needed to build a new top. Thank goodness because it was a little bit country and I wanted a little bit rock-n-roll.
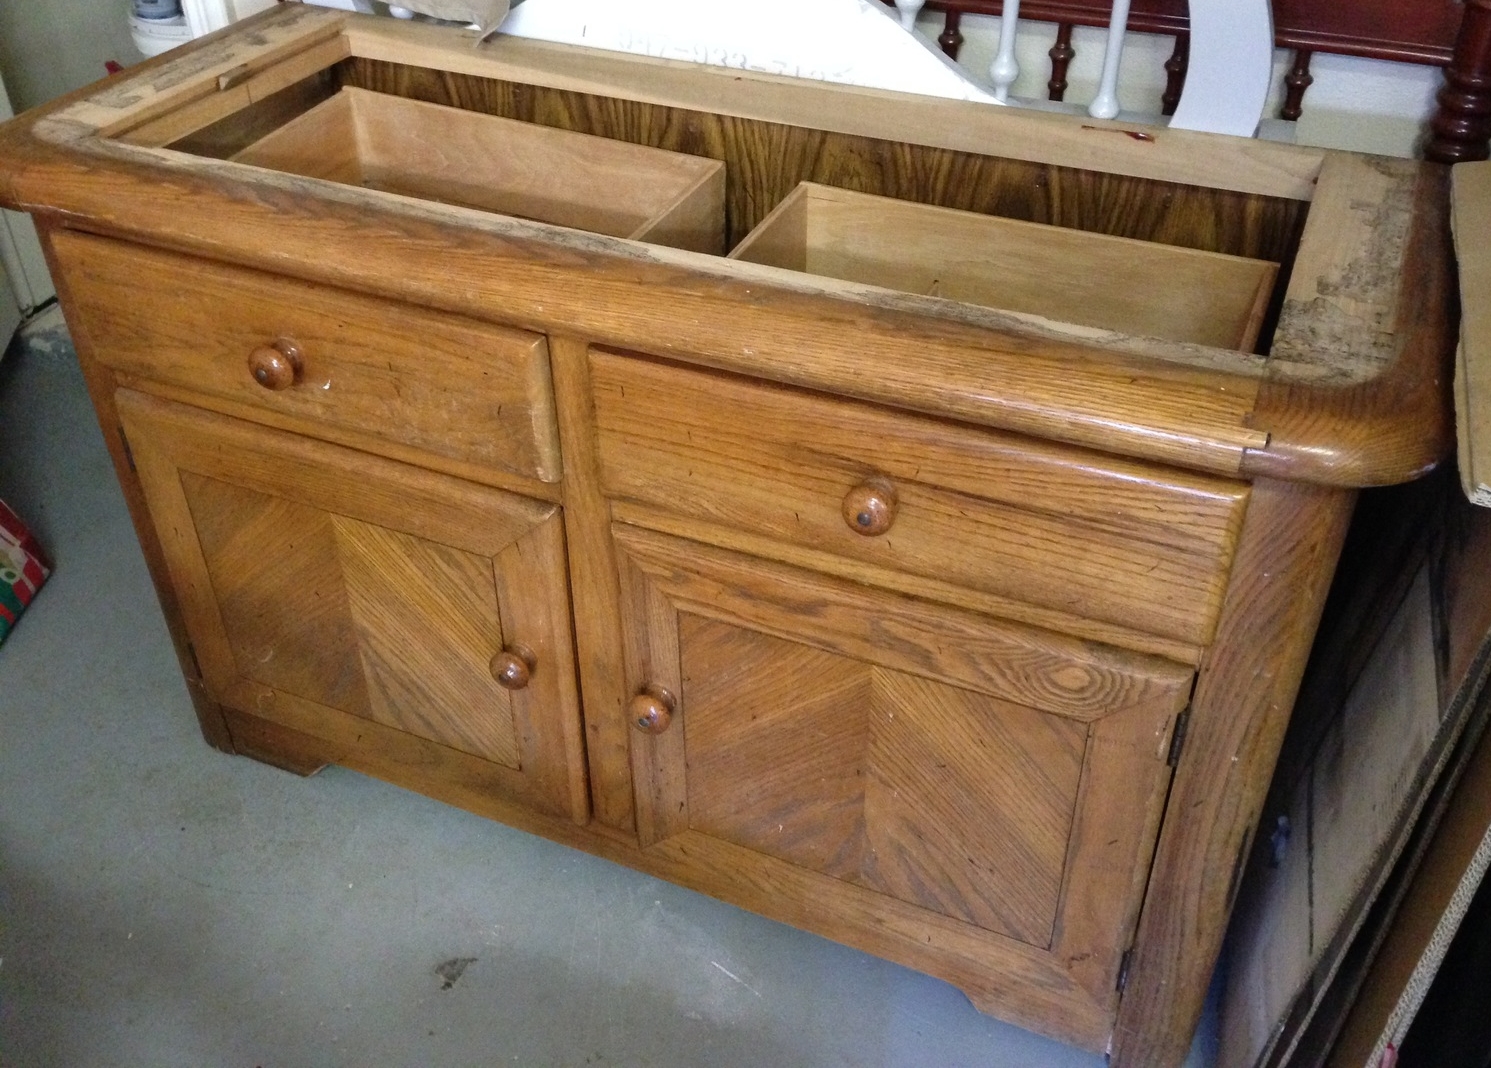
{BEFORE}
We removed the existing doors and drawers, which we saved to use on the third piece we're rebuilding and salvaging from the one original china cabinet. Triple Threat cut out the horizontal face frame pieces and sanded the openings smooth to prepare for the new apothecary doors.
Since this was designed to be a cart, we added casters from Northern Tool for only $4.99 each! The base had no place to mount them, so Triple Threat built some supports brackets which worked perfectly.

SEE THE DIFFERENCE IN HEIGHT ON THE TRIM?
After I painted the first coat of General Finishes Driftwood milk paint, Triple Threat noticed the bottom right side of the trim molding was shorter than the left side. You almost don't notice it actually. It's pretty obvious in the before picture because one side touches the ground and the other doesn't. It was built that way, which is surprising considering the high quality of this china cabinet.
Triple Threat traced the shape of the molding on the left side and used his Rikon bandsaw to cut an exact replica and then I painted right over it.
To create the faux apothecary doors, Her Tool Belt's plans called for cutting new doors from a solid wood panel, and then cutting out individual squares for the drawer fronts and gluing them on to the door panel. Triple Threat deviated a bit and instead used his Bosch router to actually carve the faux door fronts directly into the solid door panel. It can definitely be done either way though according to your skill level! And it's nice to have options, right?
Next was the layout and installation of the 18 label holders from D. Lawless Hardware. Triple Threat made a template so he could drill the mounting holes in the same location for each pull. Trust me, making a template will alleviate lots of tears and frustration.

NEW DOOR PANELS
To create an industrial, rugged look , Triple Threat used 2" x 10" pine boards to construct the new top. Using his Ridgid trim router, he smoothed out the sharp edges, and gave the whole top a light sanding to get rid of any rough spots.
The new top was stained with one coat of Varathane's Sunbleached to give it a weathered, worn, industrial appearance.

VARATHANE SUNBLEACHED STAIN
Now that the new doors and top were constructed, I got to make it pretty with paint!
I am a huge fan of layering colors to give a dimensional effect so I topped off the base coat with General Finishes brand spanking new Argentine Pearl Effects glaze. It's a shimmery silver and was the foundation for the industrial metal effect I wanted. Next, I applied a custom pewter glaze I mixed using Argentine Pearl, Driftwood and Lamp Black milk paint. There wasn't a recipe to follow, I just kept going until I got the perfect shade. Note to self: I definitely need to go back and figure out the exact ratio for future use.

{METALLIC ZINC FINISH}
After glazing, I dry brushed Lamp Black over the entire piece, which highlighted the wood grain making it stand out. This was the finishing touch for adding dimension and depth.
I sealed everything with General Finishes High Performance top coat to ensure long-term durability and awesomeness of this piece.

I am head over heals in love with this industrial apothecary cart. Of course, I want to keep it and use in my son's bigger-big boy play room. Triple Threat, on the other hand, wants to sell it. Could you part with this piece of fabulousness?!

{AFTER}
Aren't these label holders from D. Lawless Hardware the perfect accent for the faux apothecary drawers? After seeing them mounted, it made me wish they were actually functional drawers. Another project, another time.

{LABEL PULLS BY D.LAWLESS HARDWARE}
Be sure to drop by Her Tool Belt and download the FREE plans here! If you use the plans to build your own amazing industrial apothecary cabinet, please share your pictures with us on Facebook!
In case you forgot what we started with, here's the before/after. I think this is my biggest rescue and restyle to date. It is hard to believe it's actually the same piece, right?!
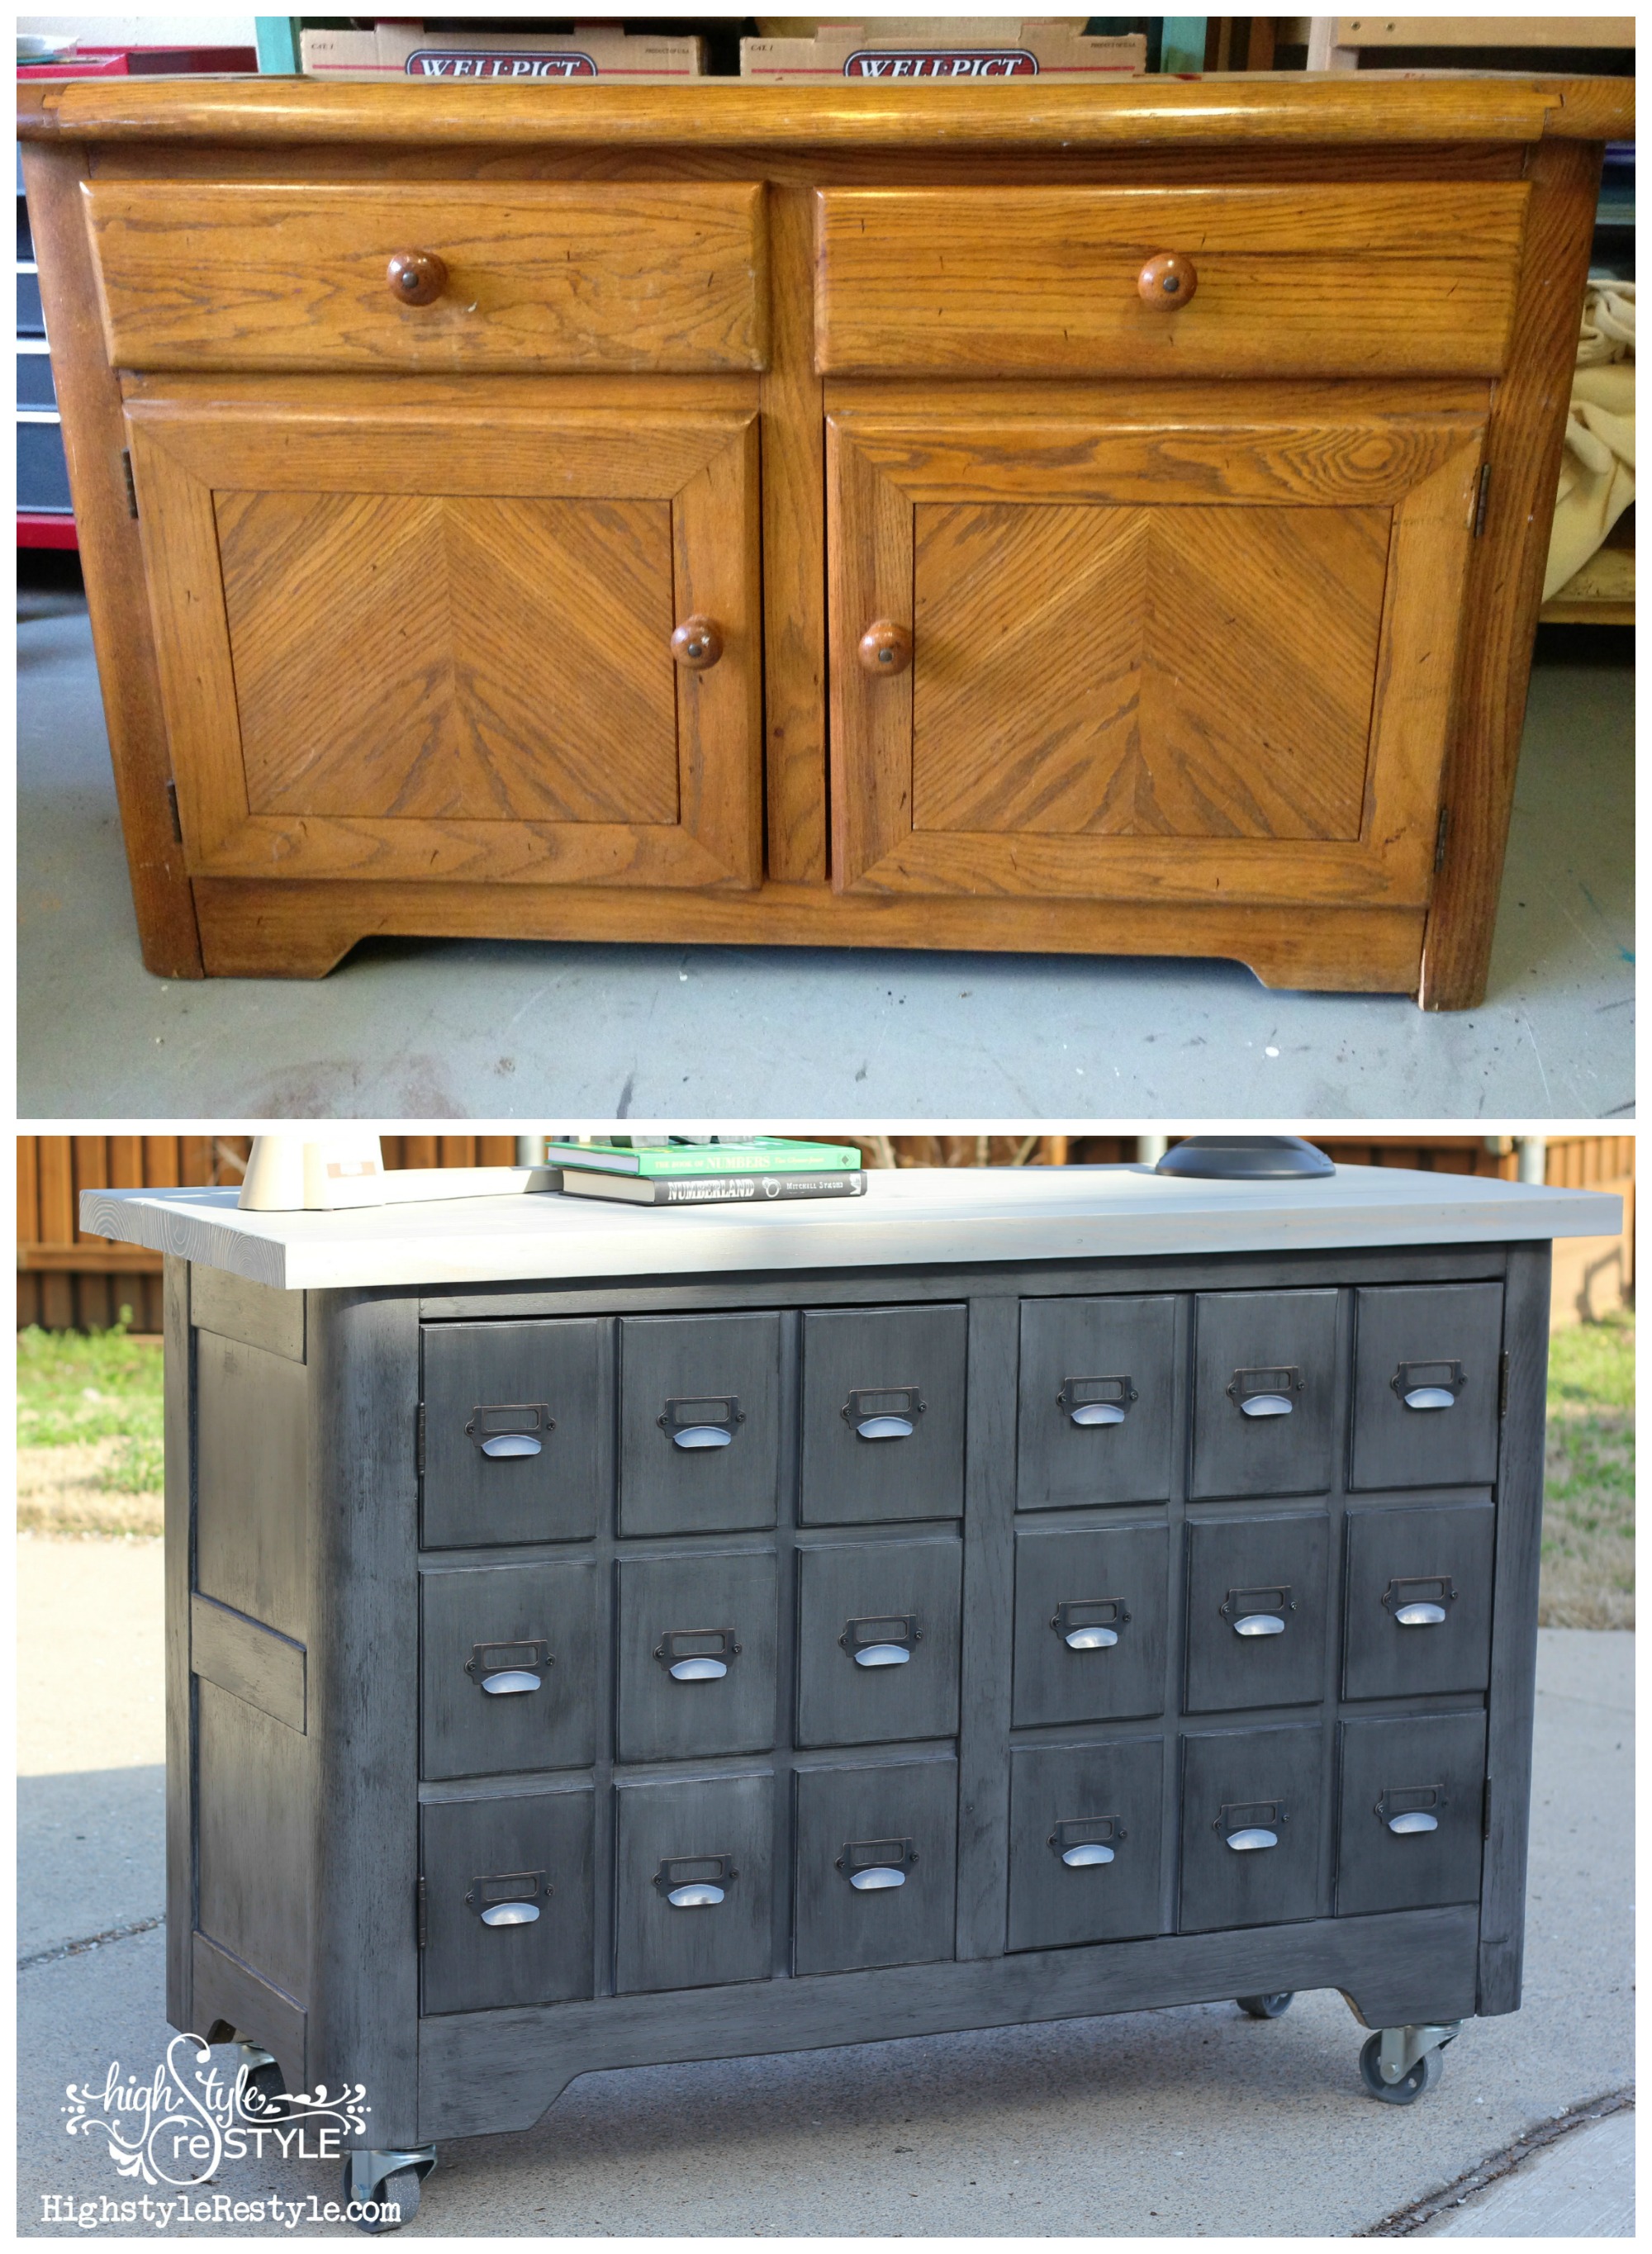
I'd love for you to pin and share my industrial apothecary cart ! My next project is using the drawers and doors from the curbside china cabinet to build a third piece of furniture. Can't beat a 3-for-1! Stay tuned to see what we do!
Disclaimer: The drawer pulls were generously provided by D. Lawless Hardware. All opinions and expressions of love are always genuinely my own.